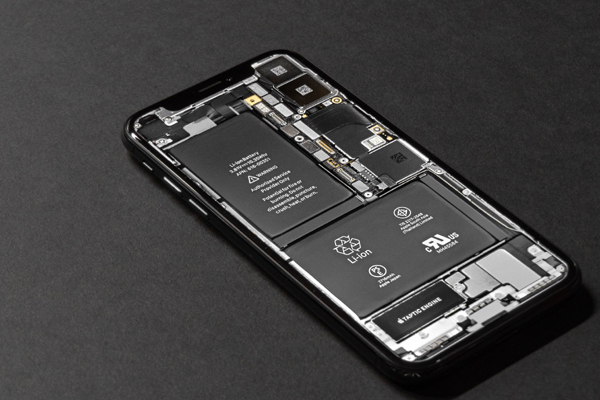
1. Battery Replacement:
Tools Needed:
- Screwdriver set
- Plastic opening tools
- Replacement battery
Steps:
- Power off your phone.
- Remove the back cover (if applicable).
- Unscrew the screws securing the battery.
- Use plastic tools to pry the battery gently from its housing.
- Replace the old battery with the new one.
- Secure the battery by tightening the screws.
- Reattach the back cover.
2. Screen Replacement:
Tools Needed:
- Screwdriver set
- Plastic opening tools
- Replacement screen
Steps:
- Power off your phone.
- Remove the back cover (if applicable).
- Unscrew the screws securing the phone's casing.
- Use plastic tools to pry open the phone, exposing the screen.
- Disconnect the cables connecting the old screen.
- Remove the old screen.
- Attach the new screen and reconnect the cables.
- Secure the phone's casing by tightening the screws.
- Reattach the back cover.
3. Charging Port Repair:
Tools Needed:
- Screwdriver set
- Plastic opening tools
- Replacement charging port
Steps:
- Power off your phone.
- Remove the back cover (if applicable).
- Unscrew the screws securing the phone's casing.
- Use plastic tools to pry open the phone.
- Locate the charging port.
- Disconnect the cable connecting the charging port.
- Remove the old charging port.
- Attach the new charging port and reconnect the cable.
- Secure the phone's casing by tightening the screws.
- Reattach the back cover.
4. Camera Replacement:
Tools Needed:
- Screwdriver set
- Plastic opening tools
- Replacement camera module
Steps:
- Power off your phone.
- Remove the back cover (if applicable).
- Unscrew the screws securing the phone's casing.
- Use plastic tools to pry open the phone.
- Locate the camera module.
- Disconnect the cable connecting the old camera.
- Remove the old camera module.
- Attach the new camera module and reconnect the cable.
- Secure the phone's casing by tightening the screws.
- Reattach the back cover.
5. Home Button Repair:
Tools Needed:
- Screwdriver set
- Plastic opening tools
- Replacement home button (if applicable)
Steps:
- Power off your phone.
- Remove the back cover (if applicable).
- Unscrew the screws securing the phone's casing.
- Use plastic tools to pry open the phone.
- Locate the home button.
- Disconnect the cable connecting the old home button.
- Remove the old home button (if it's a separate component).
- Attach the new home button and reconnect the cable.
- Secure the phone's casing by tightening the screws.
- Reattach the back cover.
Remember, these guides are general, and the specific steps may vary depending on your phone's make and model. Always refer to your device's user manual or seek professional assistance if you're uncertain. Performing DIY repairs should be done at your own risk, and if your device is under warranty, consider contacting the manufacturer or authorized service center for assistance.


Comments (0)